Motorhome steam cleaning is one of the gentlest and most effective ways to refresh a van that has spent weeks on the road. Mud, sand, spilt drinks and damp all find their way inside, and normal sprays and wipes do not always reach them. Steam uses hot vapour to loosen dirt, lift smells and cut through grease, often with very little chemical. At Guardian Shield, we like it because it is simple to learn and kind to many surfaces when used with care.
Why motorhome steam cleaning works so well
Steam is just water heated until it turns into vapour. When it hits a dirty surface, the heat softens the grime, and the moisture loosens it, so you can wipe it away. That means less hard scrubbing, and less risk of scratching plastics, worktops and paintwork.
A motorhome is a small space, so strong cleaning smells can hang around for days. Steam leaves very little residue behind, which helps the air feel fresher. The heat also breaks down the sticky film where dust, mould and germs like to settle.
Here is where it really shines:
- Lifting ground-in dirt from seams, corners and door frames.
- Freshening fabrics without soaking them through.
- Cutting grease around the hob and kitchen area.
- Cleaning hard-to-reach spots such as window tracks and fridge seals.
One golden rule: always test a small hidden patch first. Keep the nozzle moving, as too much heat in one place can mark delicate finishes such as vinyl, laminate or acrylic windows.
Motorhome upholstery cleaning and other interior jobs
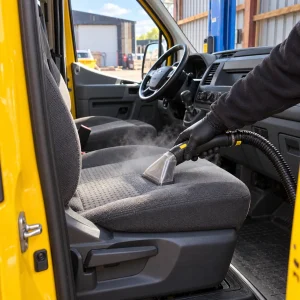
Seats, bed cushions and carpets take the biggest beating on a long trip, so motorhome upholstery cleaning is a great place to start. We suggest this simple routine:
- Vacuum everything first to remove loose sand and crumbs.
- Check the care label and test a hidden spot.
- Steam in slow, even passes, keeping the nozzle a little above the fabric.
- Blot the surface with a clean microfibre cloth to lift the loosened dirt.
- Open windows and roof vents so everything dries fully.
Drying matters more in a motorhome than at home, because airflow is limited. If you soak foam cushions, damp can settle in and bring musty smells back. Use light passes and let each area dry before you move on.
Once the soft furnishings are done, move to the kitchen, the shower room and the blinds. Steam works brilliantly on tiles, taps, sinks and the rubber seals around windows and doors. While you work, keep an eye out for soft floor patches, stained panels or any hint of a leak. Water damage and rust can spread quietly, so it pays to get problems looked at early, and our car repairs team can help with checks and fixes.
Motorhome steam cleaning tips for the underbody and wheel arches
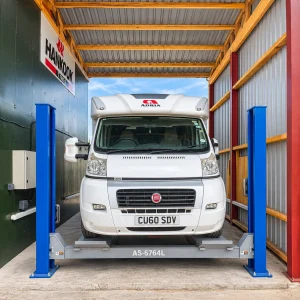
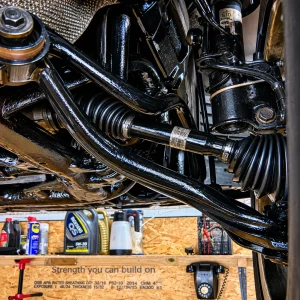
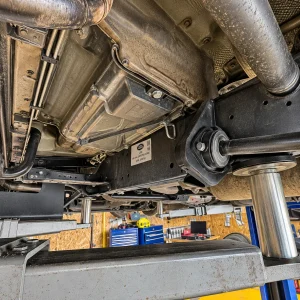
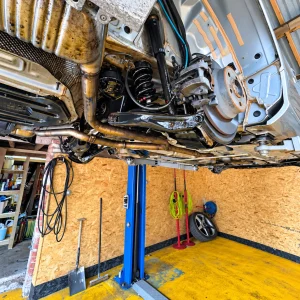
The outside of a motorhome faces a lot, and the underside faces the most. Road salt, mud and moisture collect in wheel arches and around the chassis, and they can encourage rust over time. Steam is handy here because it loosens caked-on dirt and road film without harsh scraping.
A clean, dry underside is also the best starting point for any protective coating. If the dirt or old coating is very stubborn, ice blasting treatment is another option worth looking at, because it cleans without lots of heavy scrubbing.
Steam is very hot, so please work safely:
- Wear gloves, sturdy shoes and eye protection.
- Never aim steam at wiring, sensors, fuse boxes or the gas locker.
- Keep it away from roof lights and sealant lines for long periods.
- Let the vehicle dry fully before packing it away or covering it.
For more seasonal care ideas, read our blog for tips to help your vehicle last longer.
FAQs
Can I steam clean my motorhome myself?
Yes, many owners do. A good household steam cleaner with a few simple attachments will cover seats, floors, kitchens and bathrooms. Read the care labels, test a small area first and take your time. If you are unsure about a material, it is better to ask before you start.
How often should I steam clean a motorhome?
A light clean after each big trip keeps dirt from building up. A deeper session once or twice a year, usually before and after the main travelling season, is plenty for most owners. If you travel with pets or children, you may want to refresh the soft furnishings a little more often.
Will steam damage fabrics or seals?
It can if you hold the nozzle too close, stay in one spot too long or use it on materials that dislike heat. Keep the steam moving, test first and avoid delicate trims. When used gently, steam is a kind way to clean most fabrics, tiles and rubber seals.
Keep your motorhome fresh with regular steam cleaning
Steam gives you a deep clean with less scrubbing and fewer chemicals, inside and out. Start with the upholstery, move on to the kitchen and seals, then turn to the wheel arches and underside, and always dry everything well. Done regularly, it keeps your motorhome fresher, healthier and easier to look after.
If you would like expert help with the underside of your vehicle, Guardian Shield is ready to guide you. You can book your appointment online in a few minutes. If you have questions first, simply contact us, and we will gladly talk through the best next step for your motorhome.